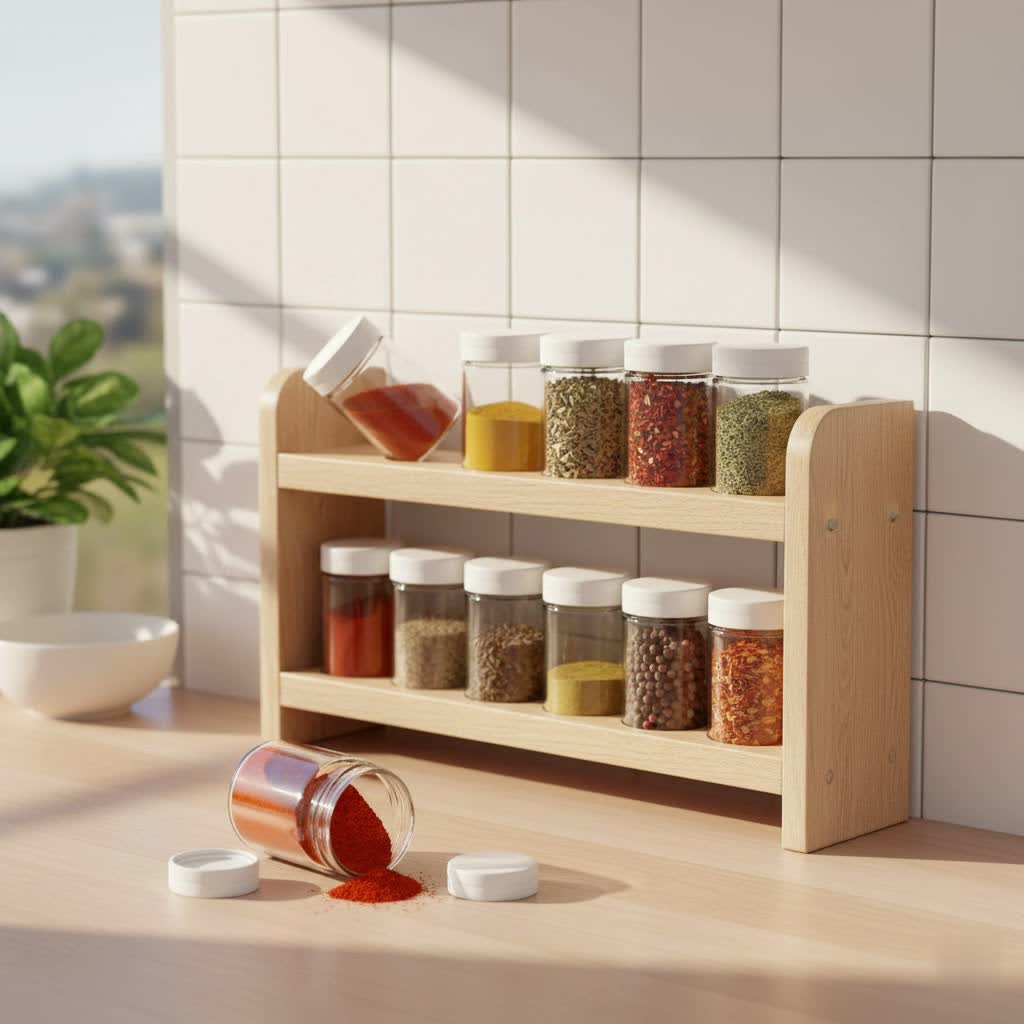
Do you find yourself battling cluttered countertops or rummaging through overflowing cabinets just to locate a single spice? It’s a common kitchen dilemma: too many seasonings, too little space, and a constant struggle for organization. But imagine a solution that transforms unused space into a sleek, accessible spice haven. Mounting magnetic jars under your cabinets is an innovative and highly effective way to conquer kitchen chaos, keeping your essential flavors visible, organized, and within easy reach.
This guide will walk you through everything you need to know about setting up your own under-cabinet magnetic spice system. We’ll explore the various types, compare materials, provide a detailed step-by-step installation guide, and share expert tips to ensure your kitchen remains a harmonious and efficient cooking space.
The Undeniable Benefits of Under-Cabinet Magnetic Jars
Embracing magnetic spice jars under your cabinets offers a myriad of advantages that go beyond simple organization. This clever storage method can revolutionize your kitchen, making cooking more enjoyable and efficient.
First and foremost, it’s a remarkable space-saving solution. By utilizing the often-overlooked underside of your upper cabinets, you reclaim valuable counter space and free up precious cabinet or drawer real estate. This is particularly beneficial in smaller kitchens where every inch counts, instantly making the area feel more open and uncluttered.
Secondly, magnetic jars dramatically improve accessibility. Your spices are no longer hidden away but are displayed at eye level, making it effortless to grab the exact seasoning you need without digging. This visibility not only speeds up meal preparation but also encourages you to use a wider variety of your spice collection.
Beyond practicality, a well-arranged magnetic display adds a modern and tidy aesthetic to your kitchen. With uniform jars and clear labels, it creates a professional and appealing look, turning a functional necessity into a design feature. Moreover, storing spices under cabinets can contribute to better spice preservation. Keeping them away from direct sunlight and stovetop heat (if positioned strategically) helps maintain their potency and flavor for longer periods, ensuring your ingredients are always at their best.
Exploring Different Types of Under-Cabinet Magnetic Jar Systems
When considering magnetic jar systems for under your cabinets, you generally have a few distinct approaches, each with its own set of advantages and considerations. Understanding these options will help you choose the best fit for your kitchen and DIY comfort level.
Magnetic Jars with a Mounted Ferromagnetic Surface
This is the most common and versatile DIY method. Here, the spice jars themselves are equipped with strong magnets, typically neodymium, embedded in their lids or bases. These magnetic jars then adhere to a ferromagnetic (metal) surface that you mount securely to the underside of your cabinet. The metal surface can be a pre-cut steel sheet, a magnetic strip, or even a custom-fabricated panel.
- Pros: Offers immense flexibility in arranging and rearranging jars. It’s easy to add or remove jars as your spice collection evolves. Installation of the metal surface can range from simple adhesive strips to more robust screw-in options.
- Cons: Requires the purchase or creation of both magnetic jars and a separate magnetic mounting surface. The metal surface will be visible, so aesthetics are a consideration.
|
Our Picks for the Best Spice rack in 2026
As an Amazon Associate I earn from qualifying purchases.
|
||
| Num | Product | Action |
|---|---|---|
| 1 | Copco Non-Skid 3-Tier Spice Rack Organizer for Cabinet - 10 Inch Kitchen Pantry Organizer with Raised Rims, White and Gray Step Shelf for Spices, Cans, Jars - Easy Clean Storage Solution |

|
| 2 | LAMU 2 Tier Lazy Susan Turntable Organizer 9.25'' Rotating Spice Rack Organization for Cabinet, Kitchen, Pantry, Countertop, Bathroom, Vanity, Medicine Cabinet Organizer, Clear |
|
| 3 | Spice Rack Kitchen Cabinet Organizer- 3 Tier Bamboo Expandable Display Shelf Yellow |
|
| 4 | Bunoxea Spice Rack Wall Mounted 4 Pack,Space-Saving Spice Organizer for Spice Jars and Seasonings,Screw or Adhesive Hanging Spice Rack Organizer for Your Kitchen Cabinet,Pantry Door,11.41x2.75x2.75in |
|
| 5 | Pull Out Spice Rack Organizer for Cabinet, 3 Packs Slide Out Spice Racks Organizer, Spice Cabinet Organizers, Cabinet Size Need:12'' Highx11'' Deepx5'' Wide,Each Tier Hold 10 Spice Jar - 2 Tier, Black |
|
| 6 | Orii 20 Jar Rotating Spice Rack with Spices Included & 5-Year Free Spice Refill Program – Stainless Steel Countertop Spice Rack with 3 oz Glass Jars |
|
| 7 | Sevenblue 4 Pack Strong Magnetic Spice Rack for Refrigerator, Multipurpose Magnetic Shelf for Fridge with 4 Hooks for Kitchen and Bathroom Organization, Black |
|
| 8 | LYNK PROFESSIONAL® Pull Out Spice Organization for Cabinets - 4-3/8 inch Wide – Spice Rack for Inside Cabinets, Slide Out Spice Rack Organizer for cabinet – Pull Out Spice Rack, Sliding 2 Tier Chrome |
|
| 9 | SpaceAid Bamboo Pull Out Spice Rack Organizer for Cabinet, Heavy Duty Slide Out Seasoning Kitchen Pantry Sliding Vertical Organization, 7.6" Wide, 3 Drawers(2" Wide), 2-Tier, Natural |
|
| 10 | Kamenstein 20 Jar Revolving Countertop Spice Rack with Spices Included, FREE Spice Refills for 5 Years, Polished Stainless Steel with Black Caps, 30020 |
|
Jars with Metal Lids/Bases on Embedded Magnets
A more integrated and often sleeker approach involves embedding individual magnets directly into shallow, pre-drilled holes on the underside of your cabinet. These embedded magnets then attract the metal lids or bases of your spice jars. This method creates a very minimalist look as the magnetic components are mostly hidden.
- Pros: Provides a seamless, custom-built aesthetic with minimal visible hardware. The jars appear to float effortlessly, contributing to a high-end, bespoke kitchen design.
- Cons: This method is more permanent and requires precision drilling into your cabinets, which can be daunting for some. Changing the layout or adding more jars later can be challenging. It also demands careful attention to magnet polarity during installation to ensure attraction, not repulsion.
Pre-made Magnetic Spice Racks
For those who prefer a ready-to-go solution, various brands offer complete magnetic spice rack kits. These typically include a set of magnetic jars and a matching magnetic strip or panel designed for easy installation under cabinets.
- Pros: Convenience is a major draw; these kits simplify the process by providing compatible components. They are often designed with specific aesthetics in mind, ensuring a cohesive look.
- Cons: Customization options might be limited compared to DIY systems. The initial cost can sometimes be higher, and you might not find the exact jar styles or sizes you prefer.
Comparing Mounting Methods and Materials for Magnetic Jar Systems
The success and longevity of your under-cabinet magnetic jar system largely depend on the mounting method and the materials you choose for both the mounting surface and the jars themselves. Careful selection ensures stability, durability, and a pleasing aesthetic.
Mounting Surface Materials (for systems using magnetic jars on a mounted surface)
- Galvanized Steel/Stainless Steel Sheet:
- Pros: Highly durable, provides an exceptionally strong magnetic hold for jars. Customizable to fit any cabinet dimension, allowing for expansive spice collections. Stainless steel offers excellent rust resistance.
- Cons: May require cutting tools for customization, which can be a project in itself. Visible metal surface means aesthetic finish is important.
- Magnetic Strips (Adhesive or Screw-in):
- Pros: Easy to install, especially adhesive versions, requiring minimal tools or effort. Ideal for smaller collections or specific sections. Less invasive than drilling directly into the cabinet for adhesive options.
- Cons: Adhesive strength varies; some may degrade over time or with humidity. Screw-in versions require drilling pilot holes into the cabinet. Magnetic pull might be less uniform than a solid sheet.
Jar Materials
- Glass Jars:
- Pros: Offer a classic, aesthetic appeal and allow for clear visibility of spices, which can aid quick identification. Glass is non-porous, generally considered superior for spice preservation as it doesn’t absorb odors or flavors.
- Cons: Heavier than plastic or metal, requiring stronger magnets. They are breakable, which can be a concern with overhead storage. Clear glass can expose spices to light, potentially degrading flavor over time if not positioned carefully.
- Metal Tins:
- Pros: Lightweight and highly durable, resisting breakage. Their opaque nature protects spices from light exposure, helping to maintain freshness. Can offer a sleek, industrial aesthetic.
- Cons: Contents are not visible, necessitating clear labeling on lids or bases. Some softer metals may be prone to scratching or denting over time.
Magnet Types (for jars)
- Neodymium Magnets:
- Pros: These are “rare-earth” magnets known for their incredible strength relative to their size. They provide a superior hold, crucial for securely suspending jars filled with spices, minimizing the risk of slippage or falling.
- Cons: Can be brittle if mishandled or dropped. Requires secure attachment to jar lids or bases using strong adhesives to prevent detachment.
Comparison Table: Magnetic Jar Mounting Options
| Feature | Adhesive Magnetic Strip | Screw-In Magnetic Strip | DIY Sheet Metal (Screwed/Glued) | Embedded Magnets (DIY) |
|---|---|---|---|---|
| Durability | Medium | High | High | High |
| Aesthetics | Good (minimal) | Good (minimal) | Can vary | Excellent (hidden) |
| Cost | Low-Medium | Medium | Medium-High | Medium-High |
| Installation | Easy | Moderate | Moderate-Difficult | Difficult |
| Cabinet Impact | Low (adhesive residue) | Permanent holes | Permanent holes/adhesive | Permanent holes |
| Load Capacity | Medium | High | High | Medium (depends on magnet size/glue) |
| Customization | Low | Low-Medium | High | Medium |
How to Choose the Perfect Magnetic Jar System
Selecting the ideal magnetic jar system involves a thoughtful assessment of your kitchen’s unique characteristics and your personal preferences. The right choice will seamlessly integrate into your space, providing both functionality and style.
Begin by assessing your kitchen space. Carefully measure the available underside area of your cabinets. Consider the depth, width, and any obstructions like light fixtures or cabinet frames. This will dictate the maximum size and number of jars your system can accommodate. Think about how many spices you currently have and if you anticipate your collection growing.
Next, consider your spice collection. Do you have a small, frequently used set, or an extensive array of exotic seasonings? The quantity and typical size of your spice jars will influence the type and scale of the magnetic system you need. If you regularly buy spices in bulk, larger jars might be more practical.
Evaluate your installation preferences. Are you a seasoned DIY enthusiast comfortable with power tools, or do you prefer a quick, drill-free solution? If you’re hesitant to drill into your cabinets, adhesive magnetic strips or systems might be more appealing. Conversely, if maximum security and a permanent fixture are priorities, screw-in or embedded magnet systems are superior.
Prioritize aesthetics and budget. What kind of look are you aiming for? A minimalist, hidden system or a visible, decorative display? Glass jars offer elegance, while metal tins provide an industrial chic. Your budget will also play a role, as pre-made kits, high-quality jars, and specialized metals can vary significantly in price.
Finally, always prioritize magnet strength and jar quality. Weak magnets are a recipe for disaster, leading to fallen jars and spilled spices. Look for systems or individual magnets (like neodymium) known for their strong pull force. Jars should be durable, airtight, and suitable for food storage to ensure your spices remain fresh and contained.
Where to Purchase Magnetic Jars and Mounting Supplies
Finding the right components for your under-cabinet magnetic jar system is easier than ever, with options ranging from online specialty shops to local hardware stores.
Online Retailers like Amazon, Etsy, and dedicated kitchen organization websites are excellent starting points. You’ll find a vast selection of magnetic spice jar sets, often including pre-labeled jars and magnetic strips. Brands like Gneiss Spice are known for their high-quality, often pre-filled, magnetic spice jars. These platforms allow you to compare prices, read user reviews, and have everything delivered to your door.
For Local Hardware Stores such as Home Depot or Lowe’s, you can source essential DIY components. This includes sheet metal (galvanized steel or stainless steel) that can be cut to your specific dimensions, strong adhesives like Liquid Nails or E6000, screws, and individual neodymium magnets if you plan to create your own magnetic jars or embed magnets.
Home Goods Stores sometimes carry pre-made magnetic spice racks or magnetic strips that could be adapted for under-cabinet use. Stores like Container Store or IKEA occasionally offer modular spice storage solutions that include magnetic options.
When shopping, read reviews carefully to gauge product quality and magnet strength. Compare prices across different vendors, especially for bulk items like magnets or metal sheets. Look for kits that bundle jars and mounting solutions if you prefer a simpler, coordinated approach. Don’t hesitate to ask store associates for advice on adhesives or metal types if you’re undertaking a more involved DIY project.
Step-by-Step Guide: How to Mount Magnetic Jars Under Cabinets
Mounting magnetic jars under your cabinets is a rewarding DIY project that significantly enhances kitchen functionality. This guide focuses on the popular method of attaching a metal surface to which magnetic jars adhere.
1. Gather Your Supplies
Before you begin, ensure you have all necessary materials. This list is comprehensive, but some items may vary based on your chosen mounting method (adhesive vs. screws).
- Magnetic Jars: These should have strong magnets (preferably neodymium) embedded in their lids or bases.
- Ferromagnetic Surface: A sheet of galvanized steel or stainless steel, or pre-made magnetic strips (either adhesive-backed or screw-in).
- Measuring Tools: Measuring tape, ruler, and a pencil.
- Drilling Equipment (if screwing): Drill, pilot drill bits suitable for wood and metal (if pre-drilling the metal), and a countersink bit for a flush finish.
- Screws (if screwing): Short wood screws appropriate for cabinet thickness.
- Strong Adhesive (if gluing): Liquid Nails, E6000, or construction adhesive.
- Cleaning Supplies: Degreaser, rubbing alcohol, and clean cloths.
- Level: To ensure your magnetic surface is perfectly horizontal.
- Safety Gear: Safety glasses and gloves.
2. Plan Your Layout
Careful planning prevents rework.
- Measure: Determine the exact dimensions of the cabinet underside where you wish to install the magnetic surface. Consider any lip or trim that might interfere.
- Arrange Jars: Lay out your magnetic jars on a flat surface in the desired arrangement (e.g., rows, honeycomb pattern). This helps visualize spacing and confirms the size of the metal surface you’ll need.
- Mark Placement: Using your pencil, lightly mark the exact position where the magnetic surface will be installed on the cabinet underside. If screwing, mark the precise locations for pilot holes on the cabinet.
3. Prepare the Cabinet Surface
A clean surface is crucial for strong adhesion and proper installation.
- Clean: Thoroughly clean the underside of your cabinet with a degreaser to remove any grease, grime, or dust.
- Dry & Alcohol Wipe: Allow the surface to dry completely, then wipe it down with rubbing alcohol to ensure no residue remains. This creates an optimal bonding surface for adhesives.
4. Install the Ferromagnetic Surface
This is the core of your installation.
- For Adhesive Strips/Sheets:
- Apply a strong adhesive evenly to the back of your magnetic strip or sheet. If using pre-applied adhesive, peel off the backing.
- Carefully align the strip/sheet with your pencil marks on the cabinet underside.
- Press firmly along the entire surface for the duration recommended by the adhesive manufacturer. Use a roller or even some clamps if possible to maintain consistent pressure during curing.
- For Screw-In Strips/Sheets:
- If your metal strip/sheet doesn’t have pre-drilled holes, drill pilot holes (and countersink them for a flush screw head) in the corners and along the edges.
- For extra security, you can apply a thin layer of construction adhesive to the back of the metal surface.
- Position the metal surface on your marked area.
- Using your drill and appropriate screws, carefully drive the screws through the pilot holes into the cabinet underside. Ensure screws are not too long to prevent penetrating the cabinet interior.
- (Note on Embedded Magnets: If opting for this advanced method, drill shallow, precisely sized holes into the cabinet underside. Apply epoxy into the holes, insert magnets ensuring correct polarity, then cover with more epoxy for a smooth finish. This requires high precision and experience.)
5. Prepare the Magnetic Jars
If your jars aren’t pre-magnetic, you’ll need to prepare them.
- Clean & Dry: Ensure all jars and lids are thoroughly clean and dry.
- Attach Magnets: Using a strong adhesive like E6000 or super glue, attach neodymium magnets to the inside of the jar lids (for hanging upside down) or the jar bases. Use enough magnets to provide a robust hold for a full jar of spices. Allow the adhesive to cure completely, ideally for 24-48 hours, before filling or mounting.
6. Fill, Label, and Organize
The final and most satisfying step!
- Fill: Carefully fill your jars with your chosen spices.
- Label: Crucially, label the lids of your jars clearly. When mounted under a cabinet, the lid is the most visible part, so legible labels are essential for quick identification.
- Mount: Gently place your filled and labeled magnetic jars onto the newly installed magnetic surface. Experiment with different arrangements—honeycomb patterns, neat rows, or grouping by cuisine—to find what works best for your workflow and aesthetic preference.
Expert Tips for Maximizing Your Magnetic Spice Jar System
Once your magnetic spice jar system is in place, a few expert tips can further enhance its functionality, aesthetics, and longevity. These insights will help you maintain an organized and efficient kitchen.
Labeling is Key: While often overlooked, clear and consistent labeling is paramount. “Labels on the lids of your jars are essential,” advises a seasoned chef. “When they’re hanging upside down, the lid is your only visual cue. Make them bold and legible.” Consider using waterproof labels or a label maker for a professional look and durability.
Consider Jar Contents: Strategically organize your spices. Place frequently used spices, like salt, pepper, garlic powder, and paprika, in the most accessible spots. Less commonly used spices can occupy higher or less central areas, freeing up prime real estate for daily cooking needs.
Protect from Heat and Humidity: Although under-cabinet placement generally offers protection, avoid mounting directly above a stovetop, oven, or dishwasher if possible. These areas can experience fluctuating temperatures and humidity, which can degrade spices faster and potentially weaken adhesives over time.
Test Magnet Strength Regularly: Before fully committing to a placement, always test each jar with its full contents. Gently attach and detach them to ensure the magnets provide a secure hold. If a jar feels wobbly, consider using stronger magnets or a more robust mounting solution.
Rotate and Replenish: Spices don’t last forever. Make it a habit to rotate your spice stock, moving older jars to the front and newer ones to the back. Periodically check expiration dates and replenish as needed to ensure your flavors are always vibrant.
“A well-organized spice rack is more than just pretty; it’s a testament to an efficient kitchen. Magnetic jars under cabinets simplify cooking by putting everything right where you need it, cutting down on search time and boosting culinary creativity.” – Chef Elena Rodriguez, Culinary Arts Instructor
Cleaning and Maintaining Your Magnetic Spice Jars
Maintaining your under-cabinet magnetic spice jar system is crucial for hygiene, appearance, and the longevity of both your spices and your setup. Regular cleaning prevents grime buildup and ensures optimal functionality.
For regular wiping, simply use a damp cloth with mild soap to clean the exterior of your jars and the magnetic mounting surface. This will remove everyday dust, grease splatters, and fingerprints, keeping your display looking fresh. Always ensure the magnetic surface, especially if it’s steel, is dried thoroughly after cleaning to prevent any potential rust or water spots.
Deep cleaning should be performed periodically, perhaps every few months or as needed. This involves emptying the jars, washing them thoroughly with warm, soapy water, and allowing them to air dry completely before refilling. Check the jar lids for any spice residue that might cause them to stick or affect the seal. If you have custom-attached magnets, be gentle to avoid dislodging them.
For adhesive care, periodically check the bond of your magnetic strips or sheets. If you notice any areas loosening, you may need to reapply adhesive or reinforce the mounting. For screw-mounted systems, occasionally check that all screws are tight and secure.
If your magnetic surface is made of plain steel rather than stainless steel, rust prevention is vital. Keep the area as dry as possible, especially in a kitchen environment where steam and moisture are common. Wiping down condensation immediately can significantly extend the life of your metal components. By adhering to these maintenance tips, your magnetic spice jar system will continue to be a practical and attractive feature in your kitchen for years to come.
Magnetic Jar Mounting Buying Guide
Navigating the options for magnetic jar mounting can be overwhelming, but focusing on key factors will help you make an informed decision that suits your kitchen’s needs and your personal style.
First, establish your budget. Magnetic spice jar systems can range from inexpensive DIY components to premium pre-made kits. Determine how much you’re willing to invest in jars, magnets, and mounting materials. This will narrow down your choices significantly.
Next, consider the material of your jars. Glass jars offer a classic, transparent look and are excellent for spice preservation but are heavier and more fragile. Metal tins are lighter, durable, and protect spices from light but require clear labeling. Your choice will impact both aesthetics and practicality.
Size and capacity are crucial. Assess the typical quantity of spices you use and the available space under your cabinets. Smaller jars (e.g., 1.5-2 oz) are ideal for frequently used spices and compact spaces, while larger jars (e.g., 4 oz) can accommodate bulk spices or less common seasonings.
Magnet quality cannot be overstated. Opt for neodymium magnets, known for their superior strength. For pre-made systems, check reviews for feedback on magnet hold. For DIY, choose magnets with a high pull strength rating to ensure your jars remain securely suspended, even when full.
The mounting method is a significant decision. Adhesive strips offer easy, drill-free installation, ideal for renters or those avoiding cabinet damage, but their long-term hold can vary. Screw-in metal strips or sheets provide a more permanent and robust solution, capable of holding heavier loads. The DIY embedded magnet method offers the sleekest look but requires advanced skills and a permanent alteration to your cabinets.
Finally, don’t overlook lid design. Look for airtight lids to preserve spice freshness. Some jars feature twist-to-open shaker and pour options, adding convenience during cooking. Secure lids are paramount to prevent accidental spills when handling or detaching jars.
Conclusion
Transforming the underside of your cabinets into a magnetic spice haven is a smart, stylish, and supremely practical upgrade for any kitchen. By embracing magnetic jars, you unlock valuable space, keep your essential seasonings effortlessly accessible, and contribute to their longevity by storing them away from detrimental heat and light. This